Monday, June 15, 2015

Stepper-driven paste extruder for Delta printers

Status: in progress

Last summer, one of my tinkering buddies, Miranda, and I built an FDM-type 3D printer that extruded chocolate instead of plastic.  We drew heavily from the work of Jonathan Keep, who had previously been working on extruding other paste materials but took a side-trip into chocolate.  Actually, it would be more fair to say that we used his process as a baseline to work from; aside from some custom 3D printed parts in the extruder and the fact that we used a different delta design, we essentially replicated his experiment.

Photo courtesy of Dover Mini Maker Faire
We learned a lot in the process, and had discussed evolving the extruder to be more accurate.  Air pressure was functional but had the downside of being difficult to stop and start rapidly without adding in additional valving (and potentially controls for said valves) to blow off the pressure in the system.  Looking at other designs, like the Universal Paste Extruder, the Frostruder, and the Claystruder, I saw some limitations for our particular application and I wanted to try and address them directly.  Admittedly, we might have chosen an easier medium - notably, one that didn't require precise temperature control - to start with.

In our case, I wanted to keep weight on the effector as low as possible - that could mean forcing material over a tube, but in the case of chocolate, that would require keeping the whole tube heated, which is possible but complicated.  Keeping the material reservoir on the head was possible, but bringing the weight of the stepper motor along with it (as is the case with several other designs) was not a compromise I wanted to make.  We then discussed driving the mechanism removely using a flexible drive shaft like a speedometer cable, which might also offset some of the effector weight since the cable is a bit springy.

That lead to some sketches:

Discussions, test fittings, revisions, additions from other Makerspace members resulted in this:


The stepper drives the Dremel flex shaft adapter which turns the screw, driving it downward, and pushing the plunger which extrudes the material in the syringe.

The upper backplate/cable support, the syringe holder, and the plunger are 3D printed.  The mechanism is made using 6mm linear shafting and bearings (which just snap in, thanks for that idea Paul), a section of 1/4" ACME threaded rod and captive nut, and miscellaneous hardware.  No coupler was needed to mate the Dremel tool holder to the ACME rod, but I did need to turn it down to 1/8" diameter in the lathe.  The coupler from the stepper motor to the other end of the flexible shaft had to be machined from scratch.


The pivot between the screw drive and the plunger isn't properly centered, leading to an unfortunate amount of friction, and the Dremel flexible shaft drive is a little more springy than it seemed at first, but aside from that, it appears to be viable.  Hopefully we'll be able to do some test runs soon.

8/30/2015 update:
The parts to construct this extruder are now available on Thingiverse [link] and a video of the printer in action is available on Youtube [link].

Monday, April 27, 2015

Ball joint for aluminum extrusions

In the course of designing a humanoid sculpture for an upcoming exhibit at the Dover Children’s Museum, I decided to try and come up with a lockable ball joint using common hardware.

I’ll get into the overall design of the sculpture in another post, but I’d already decided to build the skeleton out of aluminum extrusions; I sort of have a ’thing’ for them.  They’re cheap and versatile, strong, and look cool.  I had imagined using a through-bolted ball on the shoulder and using two smaller “stubs” of extrusion with milled pockets to hold the ball captive and exert clamping force.  When I was prepping some of the pieces, I had a better idea.

The extrusion I’d used previously was 20mm square with a simple one-hole cross section:
But in this project, I was using 30mm square extrusion and it has a very different cross-section:
Those 4 perimeter holes are sized to be tapped for M5 thread, which gave me an idea.  If I drilled 4 matching holes in an appropriately-sized retaining plate, I could use that to retain the ball.  I got a .75” ID, 2.0” OD flat washer and drilled it up in the mill.  I tapped the extrusion holes and bolted it together.  The result is below.


The amount of grip the washer exerts on the ball is significant, and adjusting it is just a matter of loosening the bolts slightly, repositioning the ball, and cinching them back up. I’ve built them with both steel and delrin balls.  Steel looks cooler and is available predrilled/tapped, which I recommend if you want metal because most balls available in this size are hardened steel bearing balls and are difficult to machine.  Delrin is cheap ($10 for qty. 10 1” balls) and provides better grip.

I sourced the extrusions from Misumi.  The steel and delrin balls came from McMaster.

I plan to use these a lot.

Thursday, October 30, 2014

Costume prop heavy weaponry

Status: completed

The other day I posted about some goggles I'd made in rapid prototype fashion for a Mad Max-ish character costume for the local Halloween parade.  That design came to mind while I was working on a slightly bigger prop, a Gatling-style heavy gun.

Many of my projects start in Sketchup, regardless of the intended fabrication method, because I've gotten used to the ability to size parts and check interference visually ahead of time rather than by experience halfway through a build.  I thought something imposing but lightweight would be a good idea for marching in a parade; last year's 11-foot-wide articulated wings (a post for another day) proved logistically difficult so this year, I wanted to stay a little more compact.

An early sketch:

The overall look was sort of self-determining; I wanted a rotating set of barrels with sort of standard proportions.  PVC pipe seemed a good choice for barrel material because it's light, you can glue it with CA glue, and it comes in standard sizes.  I figured I could use PVC couplers, cut into thin rings, as retainers for the barrels since they're pre-sized to fit snugly on the outside diameter of the pipes.

The "disc" that holds the barrels would be 3D printed, easy enough, and I could mount 608-type skate bearings to give smooth rotation around a 1" dowel center-shaft.  I could have gotten away with any sort of bearing, or teflon tape, or really nothing at all probably, but I have like a hundred 608 bearings in a bag so I tend to use them any time I can.

It occurred to me that I could mount a salvaged screw gun ($5 from Goodwill) as a combination handle/drive system and actually have the barrels spin in powered fashion.  Yup:


So I printed the disc parts on our large-format printer (12" cubed, home built FDM printer, that's a whole other article) and they came out okay.  Certainly good enough for light use, and they'll look fine under paint:


I knocked together a frame out of scrap wood from the wood shop, and bent some unnecessarily burly aluminum bar as a front handle.


The whole deal was primered in flat black, and then I repainted some areas in silver and then hit them with "grime" paint as described in the post about the goggles.


I made a stencil from a cartoonish skull-and-crossbones logo I found online and painted my kill-count on the side of the housing:


I'll post a video soon showing the action.  In an effort not to get mistaken for a person carrying an actual heavy gun in a crowd of people, I scrapped the plan to have sound effects and super-bright LEDs in the barrels firing in sequence.  That said, the movement of the barrels alone is pretty satisfying.

I love Halloween.


Tuesday, October 28, 2014

Post-apocalyptic scavenger goggles

Status: completed.

Nope, not steampunk.

So, here in Portsmouth, NH we have a Halloween parade that's been a tradition for something like 20 years (and some people are pretty serious about it).  The local makerspace, Port City Makerspace, is naturally a resource for the local costume/cosplay/propmaking enthusiasts.  I teach a class in introductory 3D printing and I'm always looking for practical examples of prototyping and rapid design and fabrication to talk about in my class, so of course I used 3D printing in my costume ideas.

I wanted some goggles, similar to cutting goggles, but all the ones I saw on Thingiverse were labeled "steampunk" and that irked me a little.  People should like what they like, but I've become a little biased since the aesthetic has become a bit overplayed and the execution has been watered down, by and large, to people hot-gluing gears onto top hats.  So I decided to spin my own, in rapid fashion.

I pulled out Sketchup and drew these in about 20min:


This is all pretty stock-standard stuff for someone used to Sketchup, the only slightly weird bit was getting the contour on the bottom of the housings where they would fit against my face.  The short version is that I drew a square, put a curved line of the profile I wanted across the square, extruded it to a solid with the contour I wanted on top, and then intersected it with the tubular goggle housings with the "intersect faces" command.  I deleted all the parts I didn't need, and was left with nice contours.

These are 100% about looks; they'll be worn on my head or around my neck in the parade.  I can wear them on my face and see, but the contour is not really "correct" and make them sit a little frog-eyed.  These are props, not intended for actual practical use.

3D printed in PLA and test-fit with some old photography filters from an SLR:


Primed with sandable auto-primer:


Painted with metallic spraypaint and with a little black paint brushed on for "grime":


Let me pause here for a moment and say that if you're interested in distressing objects for cosplay or costume purposes, there are many great resources on Youtube and such to guide you.  One of the best I've seen was the video from Tested where Adam Savage demonstrated some of his tricks for aging examples in his prop collection (you can check the video here.)  His techniques are an exercise in subtlety; his objects are on display and under scrutiny.  I will be taking them to a cartoonish extreme because I'll be wearing these in a parade, at night.

Here are the goggles, assembled, with touches of oxide yellow, burnt sienna, and black paint, as well as some scuffing.  They are padded with EVA foam. The strap is old leather and I attached it with some D-ring brackets intended for picture hanging.  The nose bridge in this pair is a spring; I made two other pair of these goggles and used leather.  Both work fine:


The model is on Thingiverse if you want to print a set, but please be kind and remember that I hacked the model together in (literally) minutes with little regard to fit and precise measurements and sizing.

Halloween is fun.


Wednesday, October 22, 2014

Video game cabinets

Status: complete

Each year, my employer allows folks in for trick-or-treat at Halloween.  Departments choose a theme (never scary, little kids visit, lame in my opinion) and decorate their area.  The theme chosen as the "best" by the HR department wins a pizza party for that team.  Our theme this year is "arcade" so the area will be decorated with visuals and characters from arcade games - classic games certainly, but the theme is broad and loose so skee-ball, pinball, and modern games will work their way in too.  For me, this was an excuse to build a couple of video game cabinets.

i started with an existing design, i wasn't crazy about the "look" but I liked the efficiency:  http://www.instructables.com/id/A-Super-Easy-Arcade-Machine-from-1-Sheet-of-Plywoo/

A small form-factor cabinet (like, kid-size) from a 4'x2' sheet of MDF.  I decided to scale it up to adult size on a 4'x8' sheet of MDF, and add a marquee on top because I felt it was important to the classic cabinet look.  I drew it in sketchup, fitting everything but the bezel and marquee bottom on a single MDF sheet.


Construction went pretty quickly, glue, brads, and screws hold it together.  Building it at the local makerspace (Port City Makerspace in Portsmouth, NH) meant I had access to the wood shop scrap bin for stringers and corner blocks.


A couple of coats of semi-gloss black paint has it looking pretty good.


The business end of the cabinet, the electronics, will be handled as follows:
  • An OUYA console for the brain.  Not the most traditional choice, but it allows quick-play games in HD, in fact, that's exactly what the console was designed for.  HD displays are easy to find compared to 4:3 CRT displays and easier to work with, and they look good (except for old school games).  MAME4Droid means I can also go retro if I want to, at a later date
  • A borrowed work display - a 24" widescreen desktop display
  • An HDMI to VGA converter cable with audio line-out, about $6 on Amazon
  • An X-Arcade Solo controller.  Some people say it's not the most reactive for competitive play.  But it has a quality stick, a pile of buttons, it's heavy-duty, has USB, PS2, and Serial interfaces and works natively with the OUYA.  It also cost $65, which is (at most) $20 more than the components would cost to build my own control panel.  This was a no-brainer for me.

I've tested all the components together, and they all play nice.

I have several weeks before they need to be done, and I'm about 90% done with the first cabinet, and about 60% done with a second.  Tasks remaining:
  • Fill holes and paint the second cabinet
  • Make plexi front panels for the marquees, with backlights
  • Rear-mount the displays
  • Come up with a button label scheme that doesn't look like crap
  • Choose family-friendly games for the Halloween event
Update 10/29/2014:
Well, that went well... pretty much everyone was impressed.  I think the cabinet finish could have been better, but this was intended as a low-budget, low-effort build from the start so I'm fine with that.  Here is a terrible photo in a dark room on an old iphone with a scratched lens:

Wednesday, October 2, 2013

Articulated wings for Halloween

Portsmouth has a pretty cool Halloween parade that's been going on for ~20 years.  My local makerspace, understandably, gets busy around the holiday; I think costume-making brings out the inner maker in us all.

I've been fostering a minor fixation with aluminum extrusions as a construction component since I got into 3D printer and CNC building.  They're so darn versatile and they look cool.  I though that using them to make a mechanism instead of a static frame would be interesting.  I was hunting around for a costume idea anyway, so that's how I got on the track of building a set of articulated wings.

Now, I'm no engineer.  I took physics in high school and I've been building and fixing things for a long time but when it comes to mechanics more complicated than levers and gears, I either have to do a lot of research, or wing it.  My concept was to use a collapsible parallelogram linkage so the wings could fold up on my back, or open up.  I drew a couple of sketches and then jumped into prototyping using the easiest method available to me - strapping and wood screws:


That worked out pretty well, but it wasn't going to map directly to the aluminum frame build.  I wanted smooth motion without metal-on-metal contact to cause interference or wear.  So my next thought was to come up with a hinge or pivot design.  I found some hardware from the aluminum extrusion supplier that allowed for joining of two segments with an arbitrary angle, but it didn't seem designed for constant movement.  I also couldn't find anything appropriate online, so I busted out SketchUp and made my own part.

3D printing to the rescue.  Thick-plastic carriers holding skate bearings, held captive by retaining plates.  All standard hardware, and sized to bolt right up to 20mm square profile extrusion:


I ordered the aluminum in lengths that were proportioned to my prototype, but a little bigger.  The last segment was bent to a curve that I found visually appealing and more organic.

I also added gas shocks to carry the weight of the mechanism when open, and added some rare earth magnet closure catches (salvaged from scrap hard drives)


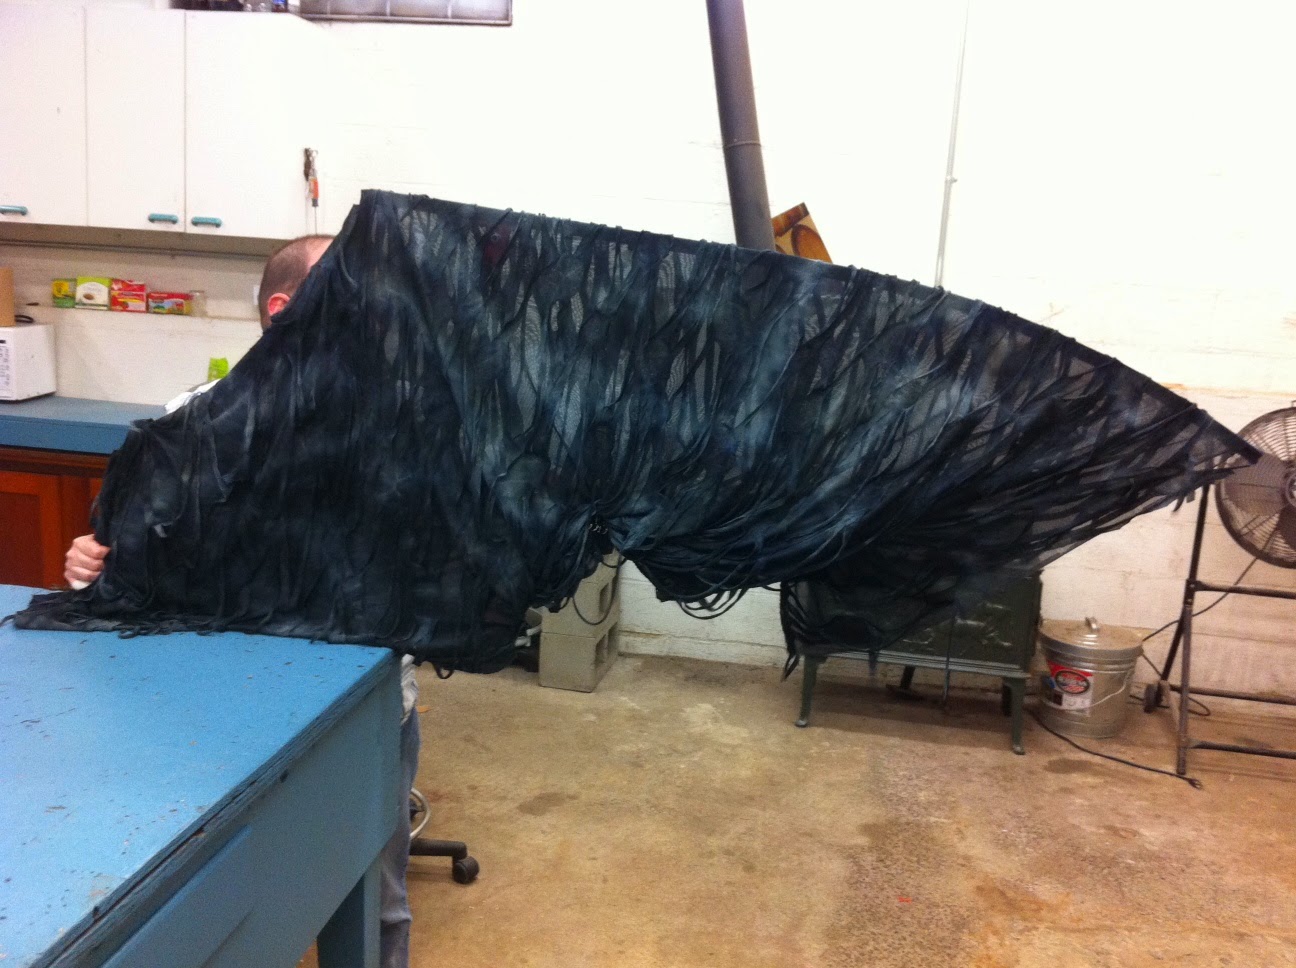
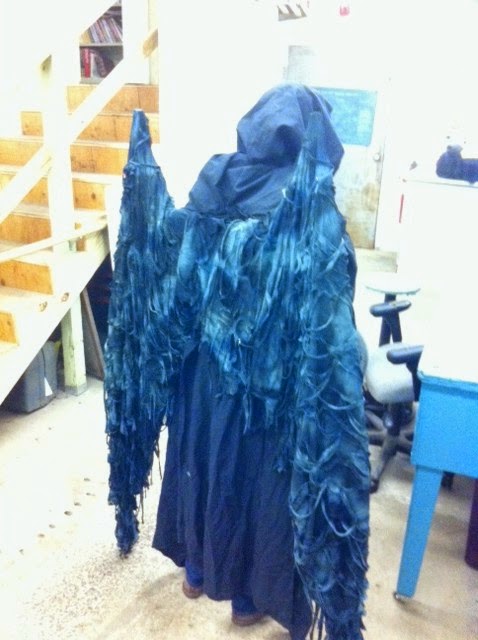
I wrapped them in a gauzy fabric I found at the local fabric store in the Halloween section.  It seemed appropriately spooky and ethereal.  The wings attached to an aluminum back plate with shoulder hooks, not unlike a marching drum (come on, I know you guys were band nerds in high school too).


I was pretty tired of construction by the end of all this, so the rest of my costume was a simple black robe.


The proportions of the wings were arbitrary, but I went BIG.  Looking back, I went too big, and if I ever revise the design I'll scale it down.  Awkwardness of motion - folding, collapsing, even just walking - increases exponentially with length of the segments.

One last shot of me haunting Portsmouth on Halloween night.


Tuesday, October 23, 2012

Batmobile prop

Status: completed

So Halloween gets a little crazy at work.  Different departments decorate their areas in a friendly competition; the winning group gets pizza and parents bring their kids in to see the decorations and beg for candy.  It's win-win.

It's also an excuse for me to build ridiculous things.

My group chose a superhero theme, and I decided I should turn our glass-walled data center into the Batcave.  I'd put a Batmobile inside, and make people wonder how I got a full-sized vehicle through the door.

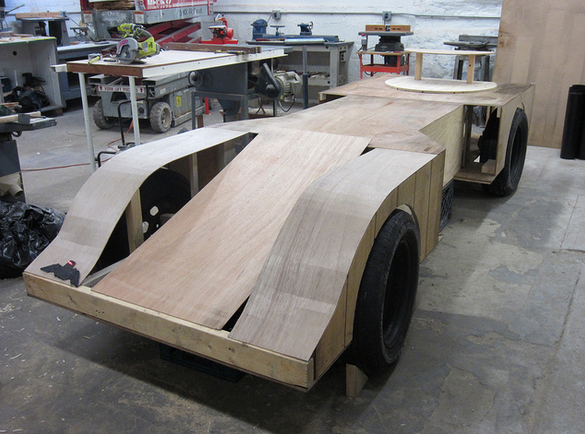
There isn't much to talk about here in terms of technique; the entire thing was build out of scrap wood and scavenged supplies, with the exception of the 2x4 "frame rails" and the box of wood screws that hold it all together.  It was hacked together any which way I could, over a single weekend.

  • It's 12' long, in two sections than can be separated and carried sideways through a door
  • The wheels are off of my old Jetta, so they're full-size
  • The fenders are kerf-bent luan
  • The whole thing sits on a pair of milk crates and the wheels aren't attached, they just sit there, so the whole thing can be easily moved in pieces
Here are a few pics of the process: